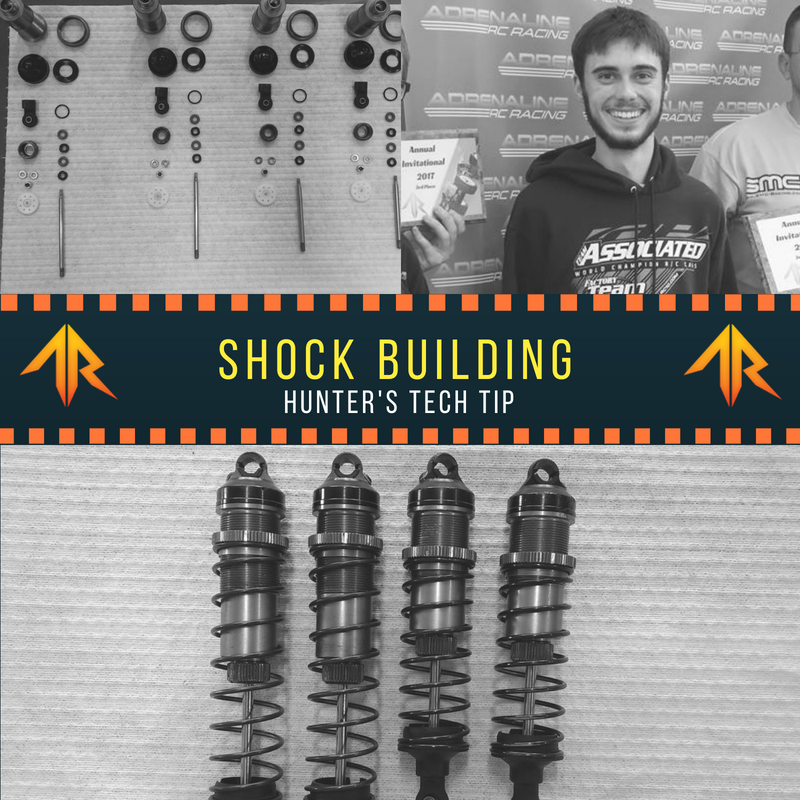
 This month Hunter is talking all about building shocks and maintaining them! We hope you enjoy his write up! We love that we will have a collection of posts that you will be able to reference at any time as we continue to create more tech tips.
Step 1: Disassembly
Start by taking apart and cleaning the shock, basically tearing down to kit form for a proper rebuild. I usually just use simple green or another similar de greaser, paper towels and a air compressor. While taking the shock apart inspect all the o-rings and shock guides for any 'ripping' or stress marks in the guides. This can cause leaking and inconsistent performance, don't hesitate to replace if needed. While taking the rod end and piston off of the shock shaft be careful not to scratch the coating, aluminum shock shaft pliers are your best friend in this case.

Step 2: O-ring/Guides Install
The easiest, most efficient way to do this, is to build your shock cartridge on a spare wrench (see pics). Put your o-rings and guides onto the shaft of your wrench in the same order that you removed them from the shock in. Apply a thin coat of o-ring grease onto the whole assembly, I used the protek grease in this build. Then just insert the whole assembly back into the bottom of your shock body. Make sure as you put it all back in, everything stays straight and level, then you just have the o-ring that goes onto the bottom of the shock body reinstall. You're now ready to put the lower shock cap back on, when tightening the cap it just needs to be snug, no need to over tighten.


Step 3: Rod End/Piston Install
Reinstalling the piston is pretty simple. Most cars have a washer that sits on the shock shaft, then the piston, and then a nut to hold it all in place. Put a small amount of Loctite onto the threads where the nut threads on. Now just make it snug, again do not over tighten! Over tightening can cause piston distortion (also shock shaft pliers again will make this a breeze). Tech Tip: take a sharpie and lightly go over top of where the piston size is etched in, it will make it much easier to read. (see pic). Now you can put that all back into the shock body, then we can thread the rod end back on. When threading the end back on theres a couple ways you can do this. I thread mine back on to where you can still see one thread, this is a pretty common method on 1/8 cars. Now if you are working on a 1/10 most of those have a 'stroke' measurement which is just the distance between the bottom of your lower shock cap and the top of your rod end, in this case either see your manual or visit your car brands website for some popular setup sheets for their recommended stroke. Again do not over tighten! It will stress the plastic and make it way more likely to fail.


Step 4: Spring Collar/Oil Install
At this point we are on the home stretch! The spring collar probably has a o-ring seated inside of it to prevent it from turning when driving. I usually put a small amount of the o-ring grease we used earlier on it just to make our job a little easier. Then just get it started onto the shock body, no need to adjust yet. For the oil part, make sure the shock is fully extended, then fill with oil up to level with the top of the shock. Slowly compress it, then bring it back out. You will have to do this a couple times. This is getting all the air that was trapped under the piston out. You may have to let them sit for a little while so all the bubbles can work their way to the top. Once you have stopped getting air out, you can top off the shock again making it level with the top. Now the shock we are building here are a 'emulsion' style shock which means it has a bleeder screw to let out any air or extra oil. So remove that screw and screw the shock cap back on (make sure the shock cap seal is installed and seated well) while the shock is fully extended (this you can tighten pretty tight but still dont over do it). Tilt the shock so that the bleeder screw hole is facing straight up, this will also help make sure all the air gets out (see pic). Slowly compress the shock, have a paper towel ready for the extra oil that will come out, once its totally compressed you can re install the bleeder screw.


Step 5: Final Assembly/ Spring Tension
Now that, that is all done you can thread the spring collar all the way to the top as a fresh starting point for setting ride height. Install your spring and spring cup. You can go to your manual or setup sheet for a measurement as a starting place for ride height. This is measured from the ground to the lowest points on the car. To raise your ride height you just tighten your spring collar, be sure to do the left and right sides the same amount you want them to be as even as possible, I will usually take a sharpie or make a mark on the collar so I can count the turns. Then to lower ride height just loosen the collars. Easy as that now your rebuilt and ready to go!


